This website is a participant in the Amazon Services LLC Associates Program, an affiliate advertising program designed to provide a means for sites to earn advertising fees by advertising and linking to amazon.com. Read my full disclosure here.
A layer of health
I don’t know about you guys, but I feel like there are so many layers to living healthier and eating cleaner. Once you learn one new thing and implement it in your life, then come to find out, you actually have to follow certain steps to get the right results. Sheesh…. will we ever arrive?!
Sprouting wheat was one of these layers for me. I had always heard about sprouted wheat, and obviously saw it cost more at the store, but I didn’t grasp the process or benefits of it until several years ago when I listened to a Wist Traditions podcast about it.

Why Sprout
I’m no teacher or scientist, so I’ll try to break this down as simply as I can. Seeds, including grains, beans and nuts are some of the most nutrient dense foods on the planet. They are packed full of vitamins and minerals like magnesium, selenium, phosphorus, iron, zinc, folate, copper, B vitamins, and vitamin E. In fact, wheat only lacks four vital nutrients that our bodies need, and those are, vitamin A, vitamin C, vitamin D, and lysine. Which is why man can not live on bread alone. So eat your fruits and vegetables, and go outside to get those last four.

Seeds and grains were created for long term storage, and contain a natural preservative called phytic acid. Phytic acid is the grains defense system, unfortunately it also defends it from us absorbing all the nutrients the grains have to offer, as well as other vitamins and minerals that happened to go down with that phytic acid. There’s a lot of controversy on whether or not it’s necessary to break down the phytic, but for centuries before conventional yeast came onto the scene, people where using sourdough to leaven their baked goods. And now, every other person has a wheat sensitivity. So I’m more in the “break it down camp.” Plus, if you look at all the animals who eat large quantities of grains, they have multi chamber stomachs which do all of the fermenting and breaking down that the human body doesn’t.
This is where sprouting comes in. Sprouting signals to the grain that it no longer need that protection and breaks down the phytic acid to allow the grain or seed to germinate.

Methods of sprouting
The sourdough process is another method of sprouting so if you are already making sourdough then you wouldn’t have to sprout your grains. However, the sourdough process is different then sourdough discard recipes, so don’t go thinking you can plop some sourdough starter in your pancake batter and you’ll be free of phytic acid. Grains have to soak for between 8 to 24 hours to break it down, so you would have to let your pancake batter set for somewhere in that time frame.
That being said, I only sprout wheat for sourdough discard recipes, or quick baking recipes like cookies, dutch babies, or biscuits. Things I want finished in 30 minutes and not 24 hours.
Soaking and drying
I use one gallon buckets for sprouting, but it could easily be done in any jar or container. It only takes about two day until they sprout, but it can take a full 24 hours to dry them. I have a Harvest Right freeze dryer so that’s what I use to dry them, but you could also use a dehydrator if you have one. (I have this Excalibur dehydrator and love it) I don’t recommend using an oven to dry them, because drying at temperatures higher than 110 can kill the enzymes in the wheat, and most ovens don’t go that low.
To sprout wheat, fill your container 3/4 full and cover with an inch or two with water. Soak it for a full 24 hours. They should plump up and almost double in size. Next, drain the remaining water and spread it out onto baking sheets or freeze dryer trays if you are using one. Cover with a dish cloth and store in a cool dark place for another 24 hours. I use my basement.

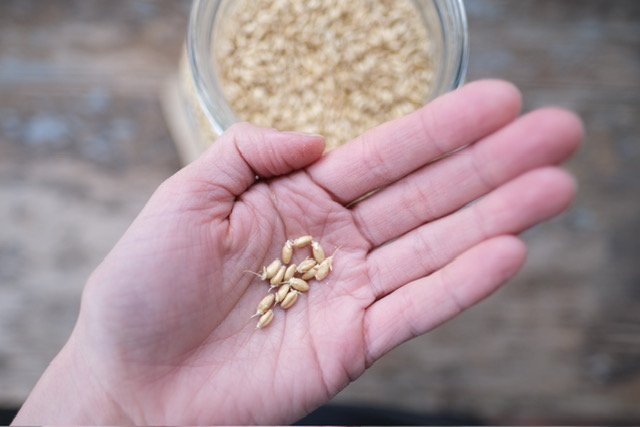
The next day you will start to see little sprouts form, and now you can move to the next step. Drying. My freeze dryer is self programed so I don’t have to set it, but if you are using a dehydrator, set it to 110 degrees, for six to eight hours.

You can store sprouted wheat berries in an airtight container for up six months. I sprout two gallons at a time, store them in gallon jars, and they last me for about six weeks.
And that’s it! It’s all set for milling. Sprouted wheat mills a little softer and fluffier then regular wheat, so I recommend weighing it into recipes, instead of measuring.
Sprouted wheat berries for milling
Equipment
- Container(s) such as gallon bucket, or jar
- baking sheet
- freeze dryer or dehydrator
Materials
- Wheat berries of your choice (soft white sprouts the fastest, hard wheats and ancient grains take longer)
- Pure filtered water
Instructions
- Fill your container(s) of choice 3/4 full of wheat berries and cover with two inches water. Let the wheat berries soak for 24 hours and then drain the remaining water and transfer them to baking sheets or freeze dryer trays, and cover with a dish towel. They should sprout significantly in the next 24 to 48 hours.
- When the wheat berries have sprouted to your desired amount, place them onto your dehydrator trays if using a dehydrator, and set the temperature to 110℉ for 6-8 hours. If using a freeze dryer, simply load the trays into it and let it run a normal cycle.
- Store in airtight containers for up to 6 months.

